This time round, we’ll clean up the bootloaders on the Surface Pro and customize rEFInd.
Cleaning Up UEFI and Boot Order #
This part can be done on any OS you have installed on your Surface (yes even Windows). The process is the same between Arch and Kali, but if you’re planning on using Windows, I recommend you check out the software Easy UEFI. It’s a very convenient GUI tool that you can use to delete unwanted booloaders, make backups of your EFI partition, etc. I chose to do everything from Arch as thats what I had already booted into.
We should remove any unnecessary bootloaders.
I recommend keeping it to a minimum.
I prefer to have USB first and foremost, then rEFInd, and if all else fails, make sure that the Windows Bootloader stays intact and I can get into my Windows system (and potentionally fix anything).
For example, if you have kali, grub, etc, you can delete them using the efibootmgr command.
Replace XXXX with the number of the bootloader from the efibootmgr output.
Open up a terminal, and grab some information about the boot managers on your system. I ended up having five, with an extra rEFInd entry. Yours will look different.
efibootmgr
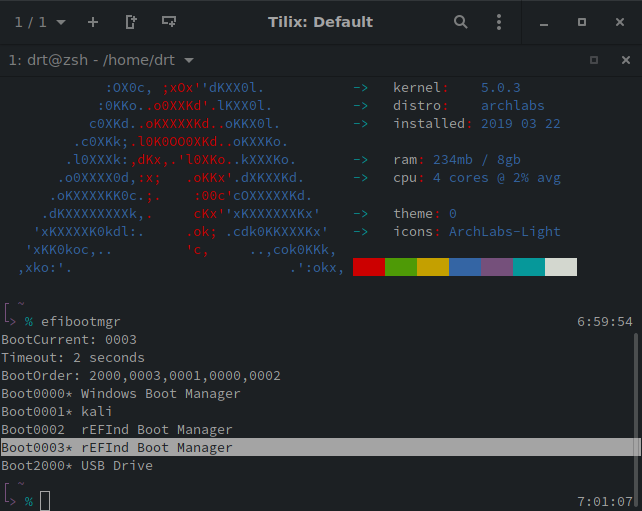
BootCurrent: 0003 is the boot manager that was used to start up my OS.
Make sure you do not delete your current bootloader!
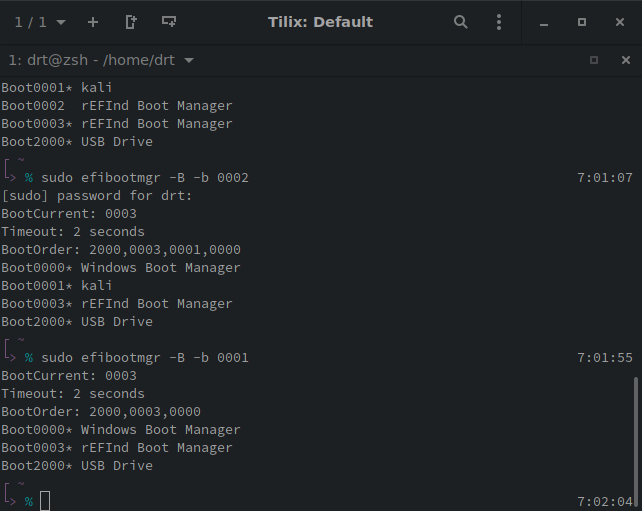
But we no longer need kali or, in my case, the extra rEFInd entry.
sudo efibootmgr -B -b XXXX
XXXX with the number from efibootmgr output.
Easy, no? The next section is optional, if youre happy with the look and feel of the default rEFInd config, then head to part five, enabling Secure Boot.
Customizing rEFInd #
Again, this step can be done on any system because we are just editing a file and it can be done in any text editor.
I recommend either Kali or Arch as the EPS is already mounted at /boot and on Windows, you need to
jump through some extra hoops to view the partition.
This will not be an in-depth guide into customizing rEFInd. The rEFInd website already has a nice theme section There are also a few other themes out there you can use as well. Plus the documentation has a detailed section on options provided when customizing rEFInd.
If you have an eye for design and want to spice it up, I recommend going for it. I have my own custom setup at my github repo, but am horrible at design.
This section will go over a few basics on customizing, and a few options I think really improve the experience when using rEFInd on a Surface.
Adding a Background #
One of the easier things to do is add a different background. Here is an sample background that I shamelessly took from the default ArchLabs backgrounds.

You’re more than welcome to choose your own background, of course.
I also recommend creating a separate folder for your custom images, icons, etc.
I prefer to create a $REFIND_HOME/assets directory.
The following commands will mount the boot partition to /mnt, download the background image, move it to your assets directory, and open vim (or the editor of your choice) to apply the settings.
mount /dev/sda1 /mnt
mkdir -pv /mnt/EFI/refind/assets/bg
curl -OL https://drt.sh/img/surface-pro-refind/orange-blue.png
mv orange-blue.png /mnt/EFI/refind/assets/bg
vim /mnt/EFI/refind/refind.conf
Once you’ve opened up the file, add the following to the top of refind.conf.
###
# my config
banner assets/bg/orange-blue.png
banner_scale fillscreen
If you’d like, reboot to test that everything worked as planned.
F10.
It will be saved to EPS/screenshot_XXX.bmp.
Changing the Icons #
You can change the icons that are displayed for the operation systems as well.
For custom OS icons, name the files as os_NAME.png.
rEFInd is smart enough to figure out the rest for you.
I’ve gone ahead and created a few.
They’re not much to look at, but its a good start.


func_NAME.png. For example, func_restart.png, func_shutdown.png, func_about.png
Create a new folder in refind/assets for your icons.
Save the files in that directory and then open up refind.conf again.
mkdir -pv /mnt/EFI/refind/assets/icons
mv ~/Downloads/os_* /mnt/EFI/refind/assets/icons
vim /mnt/EFI/refind/refind.conf
###
# my config
banner assets/bg/orange-blue.png
banner_scale fillscreen

icons_dir assets/icons
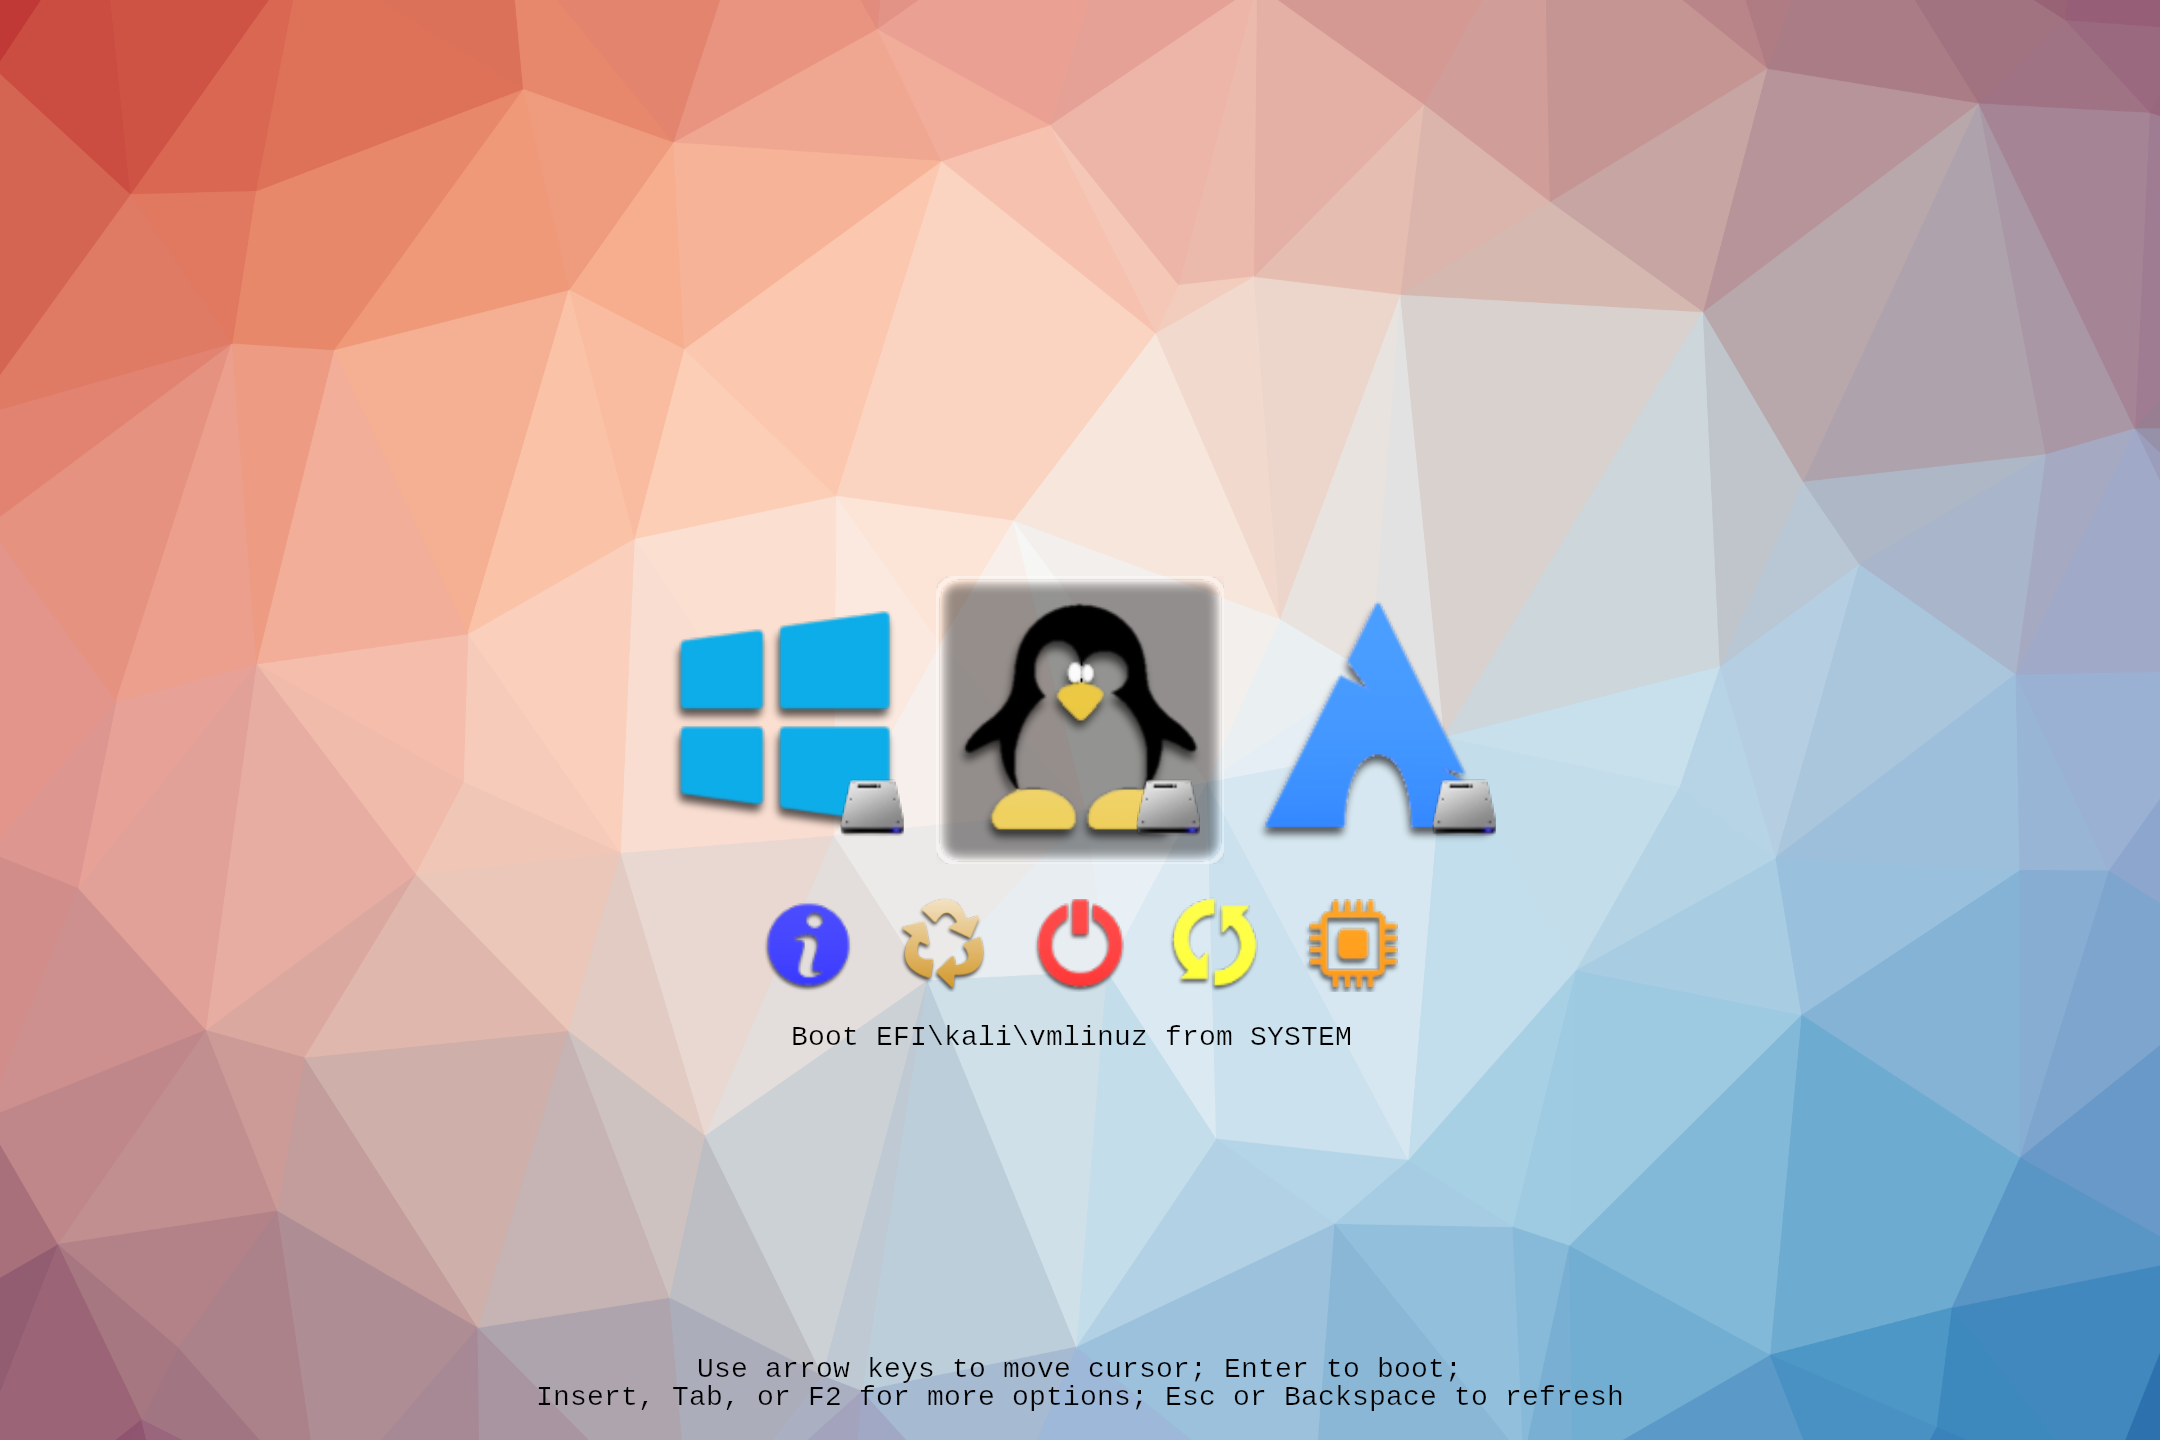
Again, easy, right? Reboot to see your icons in action!
Welp, that kind of worked.
Per rEFInd Documentation: Certain boot loaders have hard-coded icons associated with them. For instance, filenames beginning with
vmlinuzorbzImageacquire Linux “Tux” icon and thebootmgfw.efiloader acquires a Windows icon.
The Windows Icon #
Sadly, creating an icon such as os_windows.png fails to load.
We can fix that by manually adding a menuentry into the conf file.
Fortunately, rEFInd already places a stub for us in the configuration file.
Edit refind.conf to reflect the following.
###
# my config
banner assets/bg/orange-blue.png
banner_scale fillscreen

icons_dir assets/icons

scanfor manual, internal, external
default_selection "Windows"

menuentry "Windows" {
    icon   /EFI/refind/assets/icons/os_windows.png
    loader \EFI\Microsoft\Boot\bootmgfw.efi
    enabled
}
You’ll notice I added in default_selection "Windows".
This is a personal preference if I am using my Surface in tablet mode.
No need to attach a keyboard, Windows is always the default option now.
The added scanfor option tells rEFInd what to look for on the system.
By default, menuentrys are ignored and must be told to be displayed.
If we had specified scanfor manual only, then ONLY THE WINDOWS entry would be displayed when we rebooted.
This way, we can still get back into your Linux system.

Ugh… theres TWO Windows entries! This is because of scanfor manual internal.
It loads our menuentries first, then scans the EPS for all the bootable images.
Thus the double Windows entry.
Don’t worry, we can fix this…
Manually Adding [Linux] Entries #
This is where things start to get a little more complicated.
The menuentry options are great because it allows the end-user to really control over how rEFInd should handle their operating systems.
The problem is that the menuentry options allows the end-user to really control over how rEFInd should handle their operating systems.
Having full control can lead to boot problem, causing headaches, frustration, even thrown broken laptops.
I’ve provided the menuentrys that I’ve used to get the Surface Booting properly below.
Update it as you need.
You can use lsblk to get your devices PARTUUID or use the refind_linux.conf files that you created earlier.
scanfor option to only allow manual and external.
Please
read the docs for more info on what rEFInd should scan for.
###
# my config
banner assets/bg/orange-blue.png
banner_scale fillscreen

icons_dir assets/icons

scanfor manual, external
default_selection "Windows"

menuentry "Windows" {
    icon   /EFI/refind/assets/icons/os_windows.png
    loader \EFI\Microsoft\Boot\bootmgfw.efi
    enabled
}

menuentry "Kali Linux" {
    icon     /EFI/refind/assets/icons/os_kali.png
    volume   "KALI"
    loader   /EFI/kali/vmlinuz
    initrd   /EFI/kali/initrd.img
    options  "root=PARTUUID=XXXXXXXX-XXXX-XXXX-XXXX-XXXXXXXXXXXX rw add_efi_memmap"
    enabled
}

menuentry "Arch Linux" {
    icon     /EFI/refind/assets/icons/os_arch.png
    volume   "ARCH"
    loader   /EFI/arch/vmlinuz-linux
    initrd   /EFI/arch/initramfs-linux.img
    options  "root=PARTUUID=XXXXXXXX-XXXX-XXXX-XXXX-XXXXXXXXXXXX rw add_efi_memmap"
    submenuentry "Boot using fallback initramfs" {
        initrd /EFI/archinitramfs-linux-fallback.img
    }
    submenuentry "Boot to terminal" {
        add_options "systemd.unit=multi-user.target"
    }
    enabled
}
Now that these will be our primary way of booting, we can delete our refind_linux.conf files.
rm /mnt/EFI/arch/refind_linux.conf
rm /mnt/EFI/kali/refind_linux.conf

Fonts #
If you’re not interested in changing the default font then move along.
If you’re interested in creating your own to be used on rEFInd, take a look at the font section in the documentation.
If you’re NOT interested in trying to make your own, I’ve converted four fonts for you that can be used in rEFInd.
Each zip file contains a PNG for the font in the sizes of 12px, 14px, 16px, 24px, 28px
| Font | Download Link |
|---|---|
| Fira Code | Download Fira Code font for rEFInd |
| Ubuntu Mono | Download Ubuntu Mono font for rEFInd |
| Go Mono | Download Go Mono font for rEFInd |
| Hack | Download Hack font for rEFInd |
Here’s how you can add these fonts to your rEFInd installation.
mount /dev/sda1 /mnt
mkdir -pv /mnt/EFI/refind/assets/fonts/{fira,ubuntu,go,hack}
mkdir: created directory '/mnt/EFI/refind/assets/fonts'
mkdir: created directory '/mnt/EFI/refind/assets/fonts/fira'
mkdir: created directory '/mnt/EFI/refind/assets/fonts/ubuntu'
mkdir: created directory '/mnt/EFI/refind/assets/fonts/go'
mkdir: created directory '/mnt/EFI/refind/assets/fonts/hack'
unzip ~/Downloads/hack-refind.zip -d /mnt/EFI/refind/assets/fonts/hack
unzip ~/Downloads/go-mono-refind.zip -d /mnt/EFI/refind/assets/fonts/go
unzip ~/Downloads/ubuntu-mono-refind.zip -d /mnt/EFI/refind/assets/fonts/ubuntu
unzip ~/Downloads/fira-code-refind.zip -d /mnt/EFI/refind/assets/fonts/fira</code>
And to display the font is easy, just use font and point to the image file.
Personally I like, the Hack font at 28px
###
# my config
banner assets/bg/orange-blue.png
banner_scale fillscreen

icons_dir assets/icons

scanfor manual, external
default_selection "Windows"

font assets/fonts/hack/hack-28.png

--- snip ---
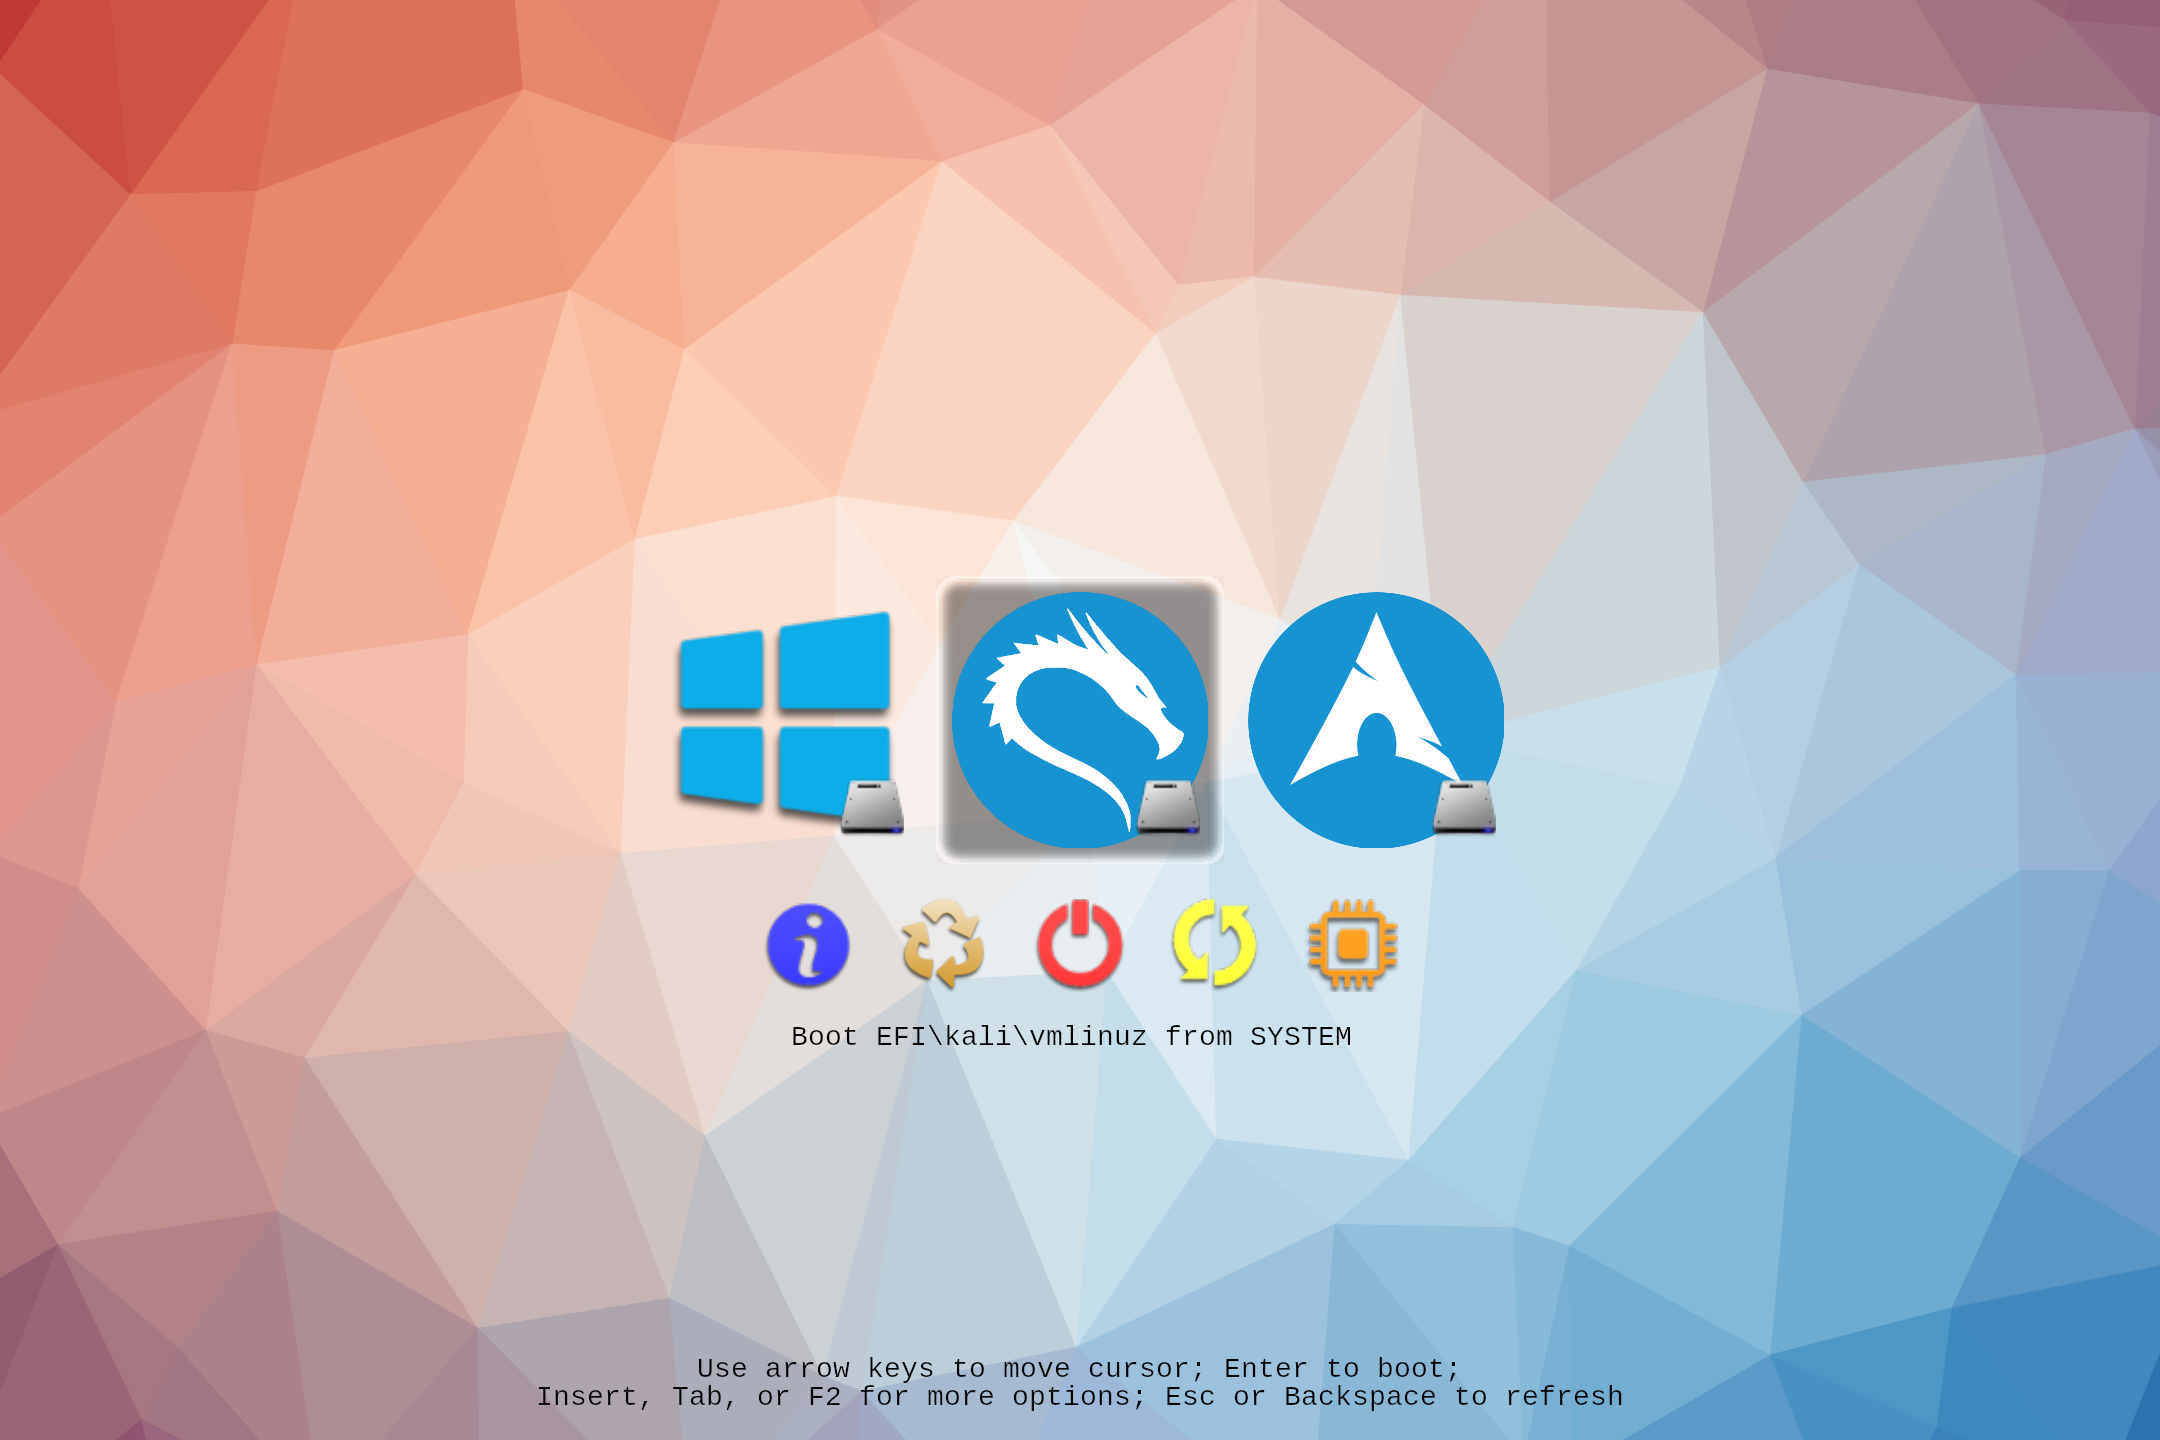
Reboot and check out your handywork
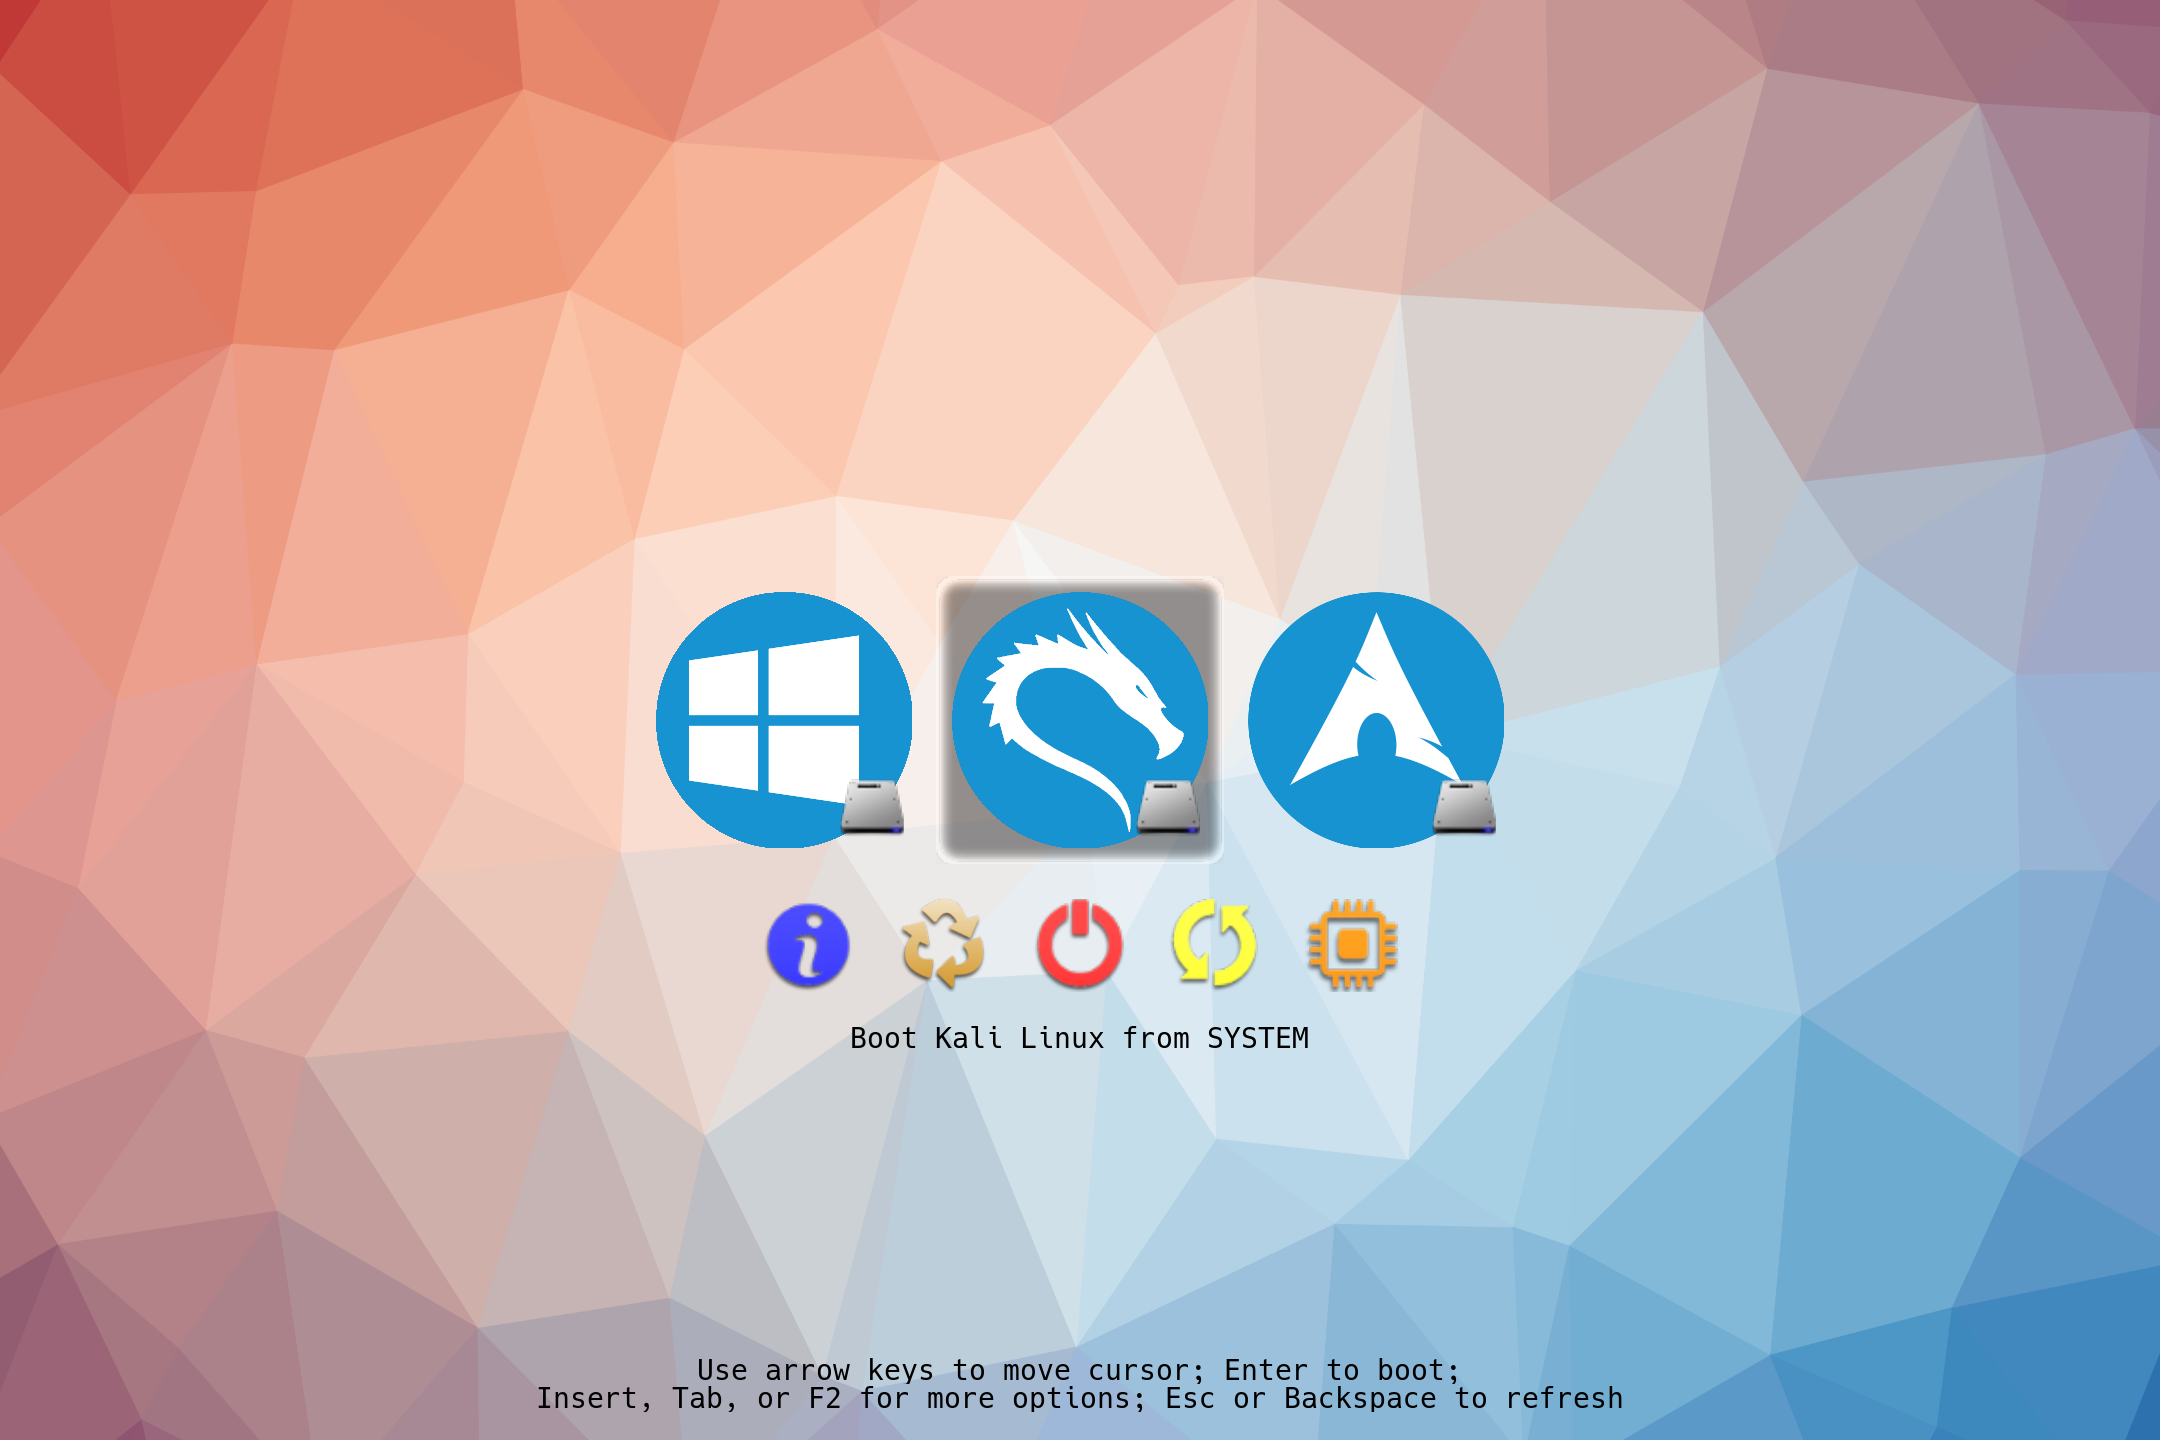
I know it might not look like much. But its different! And YOU made it your own! Thats what counts!
Final Tweaks #
The last couple of tweaks I like to add hide a few of the elements that I feel are not very important to me. It also changes the icon sizes a bit; sets the timout to five seconds so I’m not waiting forever; and finally it enables the touch screen. Which is pretty useful if I’m lazy and just want to press the icon instead.
timeout 5

hideui singleuser arrows hints
showtools about reboot shutdown

small_icon_size 72
big_icon_size 256

enable_touch true
The Final refind.conf File #
TL;DR just copy paste.
PARTUUID
#
# refind.conf
# Configuration file for the rEFInd boot menu
#

###
# my config

## background options
banner assets/bg/orange-blue.png
banner_scale fillscreen

## location for refind to get icons from
icons_dir assets/icons

## only grab menuentry and usb
scanfor manual, external
default_selection "Windows"

## change the fonts (hack, ubuntu, fira, go)
font assets/fonts/hack/hack-28.png

## no need to wait
timeout 5

## keep the ui clean
hideui singleuser arrows hints
showtools about reboot shutdown

## icon sizes (big=os, small=func)
small_icon_size 72
big_icon_size 256

## touch support
enable_touch true

## operating systems
menuentry "Windows" {
    icon   /EFI/refind/assets/icons/os_windows.png
    loader \EFI\Microsoft\Boot\bootmgfw.efi
    enabled
}

menuentry "Kali Linux" {
    icon     /EFI/refind/assets/icons/os_kali.png
    volume   "KALI"
    loader   /EFI/kali/vmlinuz
    initrd   /EFI/kali/initrd.img
    options  "root=PARTUUID=XXXXXXXX-XXXX-XXXX-XXXX-XXXXXXXXXXXX rw add_efi_memmap"
    enabled
}

menuentry "Arch Linux" {
    icon     /EFI/refind/assets/icons/os_arch.png
    volume   "ARCH"
    loader   /EFI/arch/vmlinuz-linux
    initrd   /EFI/arch/initramfs-linux.img
    options  "root=PARTUUID=XXXXXXXX-XXXX-XXXX-XXXX-XXXXXXXXXXXX rw add_efi_memmap"
    submenuentry "Boot using fallback initramfs" {
        initrd /EFI/archinitramfs-linux-fallback.img
    }
    submenuentry "Boot to terminal" {
        add_options "systemd.unit=multi-user.target"
    }
    enabled
}
Conclustion #
I hope you go rEFId looking the way out like! Post a screen shot of your theme. I’d love to see how you customized everything. We’re almost done setting up our Surface Pro 3. Last thing to do is lock it down by re-enabling Secure Boot. Be sure to check out part 5!