If you’re happy without Secure Boot, you can skip this step. The following will erase all keys on your system, create your own keys, and use them to sign all the binaries needed to keep your computer running.
NOTE: Make sure the only keys that are currently installed on your system are only the Microsoft official keys. These are what are on your system by default. If you want to revert to keeping only the Microsoft keys, delete all your keys from the BIOS/UEFI menu. The option to install factory keys will become available.
Making Keys #
You can do this on either Linux distro, but I did everything from Kali.
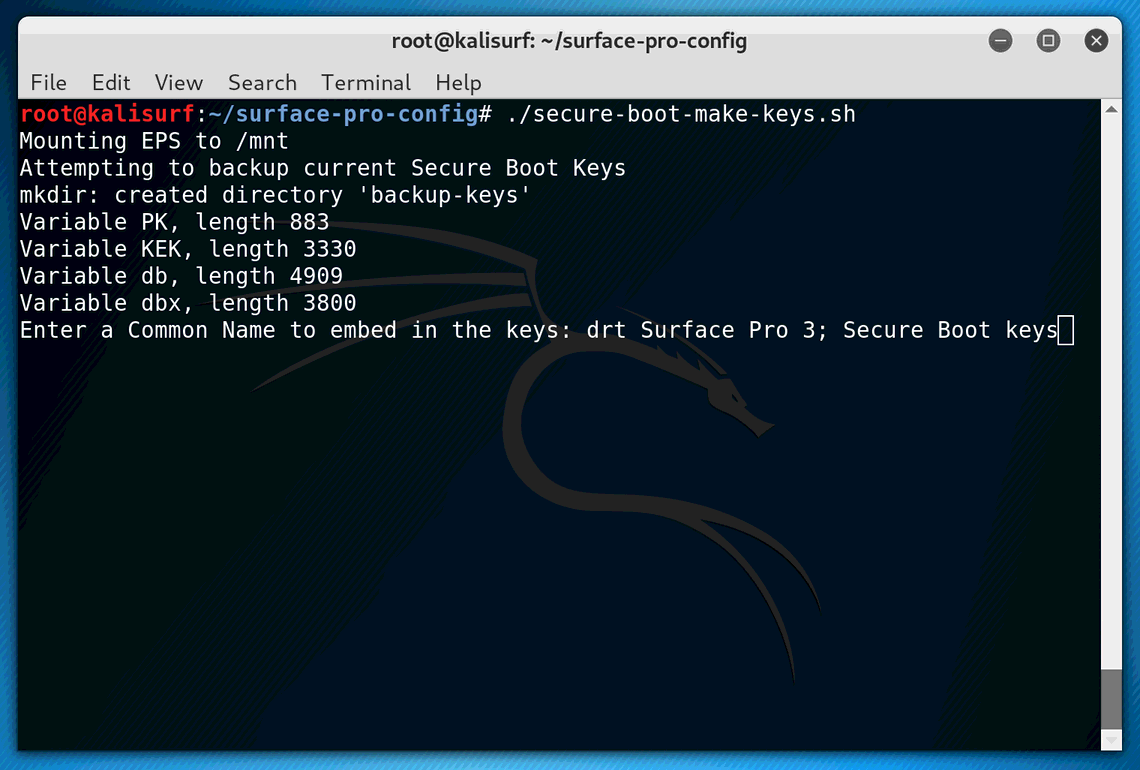
I tried to make it as painless as possible, execute the secure-boot-make-keys.sh
script from the repo.
You’ll be prompted to enter a common name to be used across all keys.
./surface-pro-config/secure-boot-make-keys.sh
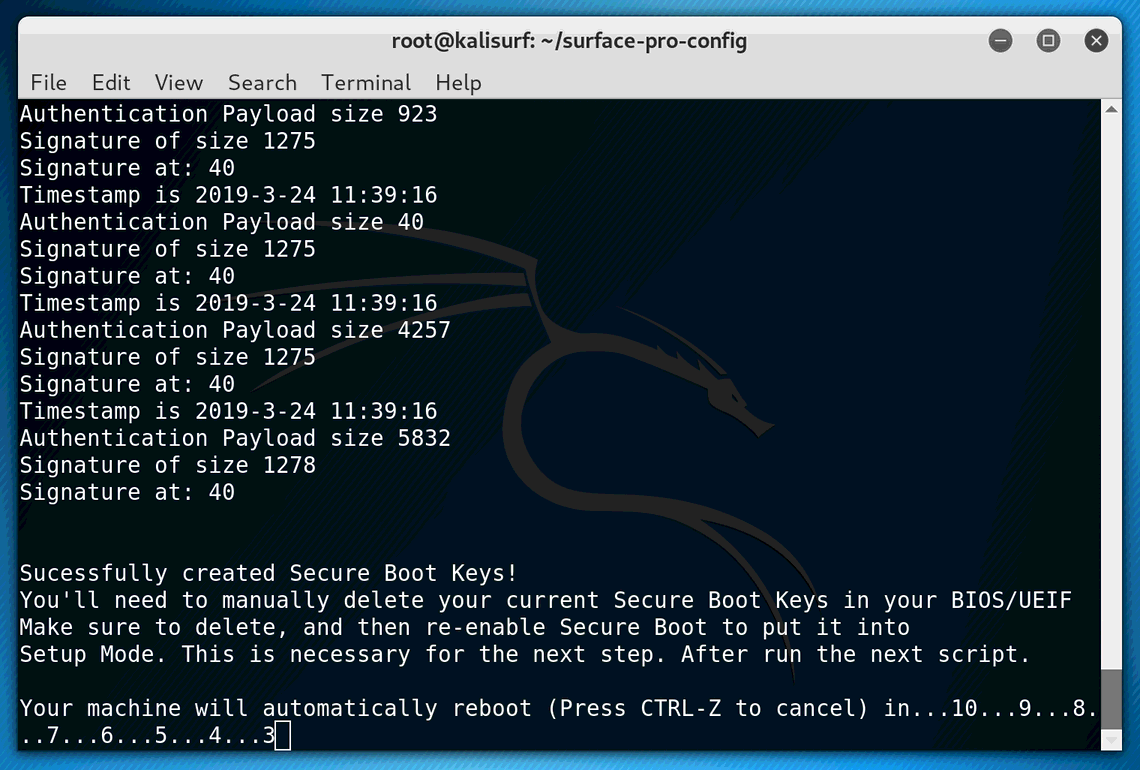
REBOOT will occur in automatically in 10 seconds.
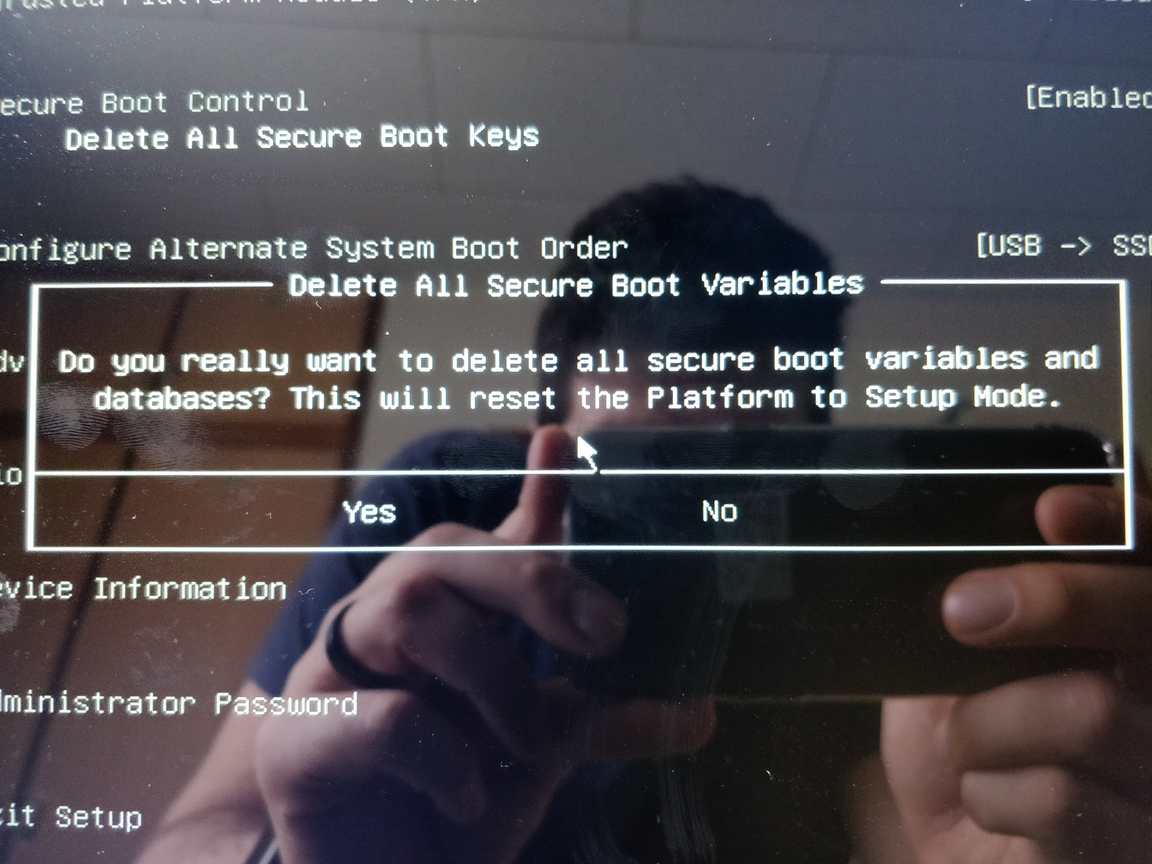
Go into BIOS/UEFI, delete the curret keys, and enable Secure Boot. This is called Setup Mode, and it is what we need in order to make changes and install the everything.
REBOOT into Kali
Signing #
Before installing the keys, the secure-boot-install-keys.sh script has hard-coded locations for the binaries.
If you’ve been making changes along the way, you will need to adjust the names and locations of your binaries:
EPS=/dev/sda1
MOUNT=/mnt

# edit to your needs
declare -a BINARIES=(
"$MOUNT/EFI/kali/vmlinuz"
"$MOUNT/EFI/arch/vmlinuz-linux"
"$MOUNT/EFI/refind/refind_x64.efi"
)
Then run the script to install your keys and sign your binaries.
./surface-pro-config/secure-boot-install-keys.sh
Mounting EPS to /mnt
Attempting to backup current Secure Boot Keys
mkdir: created directory 'current-keys'
Variable PK has no entries
Variable KEK has no entries
Variable db has no entries
Variable dbx has no entries
Signing /mnt/EFI/kali/vmlinuz...
Signing Unsigned original image
Signing /mnt/EFI/arch/vmlinuz-linux...
Signing Unsigned original image
Signing /mnt/EFI/refind/refind_x64.efi...
Signing Unsigned original image
mkdir: created directory '/mnt/keys'
copied 'compound_db.auth' -> '/mnt/keys/./compound_db.auth'
removed 'compound_db.auth'
copied 'compound_KEK.auth' -> '/mnt/keys/./compound_KEK.auth'
removed 'compound_KEK.auth'
copied 'noPK.auth' -> '/mnt/keys/./noPK.auth'
removed 'noPK.auth'
copied 'PK.auth' -> '/mnt/keys/./PK.auth'
removed 'PK.auth'
copied 'DB.cer' -> '/mnt/keys/./DB.cer'
removed 'DB.cer'
copied 'KEK.cer' -> '/mnt/keys/./KEK.cer'
removed 'KEK.cer'
copied 'PK.cer' -> '/mnt/keys/./PK.cer'
removed 'PK.cer'
copied 'DB.crt' -> '/mnt/keys/./DB.crt'
removed 'DB.crt'
copied 'KEK.crt' -> '/mnt/keys/./KEK.crt'
removed 'KEK.crt'
copied 'PK.crt' -> '/mnt/keys/./PK.crt'
removed 'PK.crt'
copied 'compound_db.esl' -> '/mnt/keys/./compound_db.esl'
removed 'compound_db.esl'
copied 'compound_KEK.esl' -> '/mnt/keys/./compound_KEK.esl'
removed 'compound_KEK.esl'
copied 'DB.esl' -> '/mnt/keys/./DB.esl'
removed 'DB.esl'
copied 'KEK.esl' -> '/mnt/keys/./KEK.esl'
removed 'KEK.esl'
copied 'noPK.esl' -> '/mnt/keys/./noPK.esl'
removed 'noPK.esl'
copied 'PK.esl' -> '/mnt/keys/./PK.esl'
removed 'PK.esl'
copied 'DB.key' -> '/mnt/keys/./DB.key'
removed 'DB.key'
copied 'KEK.key' -> '/mnt/keys/./KEK.key'
removed 'KEK.key'
copied 'PK.key' -> '/mnt/keys/./PK.key'
removed 'PK.key'
copied 'myGUID.txt' -> '/mnt/keys/./myGUID.txt'
removed 'myGUID.txt'
created directory '/mnt/keys/./backup-keys'
copied 'backup-keys/old_PK.esl' -> '/mnt/keys/./backup-keys/old_PK.esl'
copied 'backup-keys/old_KEK.esl' -> '/mnt/keys/./backup-keys/old_KEK.esl'
copied 'backup-keys/old_db.esl' -> '/mnt/keys/./backup-keys/old_db.esl'
copied 'backup-keys/old_dbx.esl' -> '/mnt/keys/./backup-keys/old_dbx.esl'
removed 'backup-keys/old_PK.esl'
removed 'backup-keys/old_KEK.esl'
removed 'backup-keys/old_db.esl'
removed 'backup-keys/old_dbx.esl'
removed directory 'backup-keys'
created directory '/mnt/keys/./current-keys'
copied 'current-keys/old_PK.esl' -> '/mnt/keys/./current-keys/old_PK.esl'
copied 'current-keys/old_KEK.esl' -> '/mnt/keys/./current-keys/old_KEK.esl'
copied 'current-keys/old_db.esl' -> '/mnt/keys/./current-keys/old_db.esl'
copied 'current-keys/old_dbx.esl' -> '/mnt/keys/./current-keys/old_dbx.esl'
removed 'current-keys/old_PK.esl'
removed 'current-keys/old_KEK.esl'
removed 'current-keys/old_db.esl'
removed 'current-keys/old_dbx.esl'
removed directory 'current-keys'
umount: /mnt unmounted
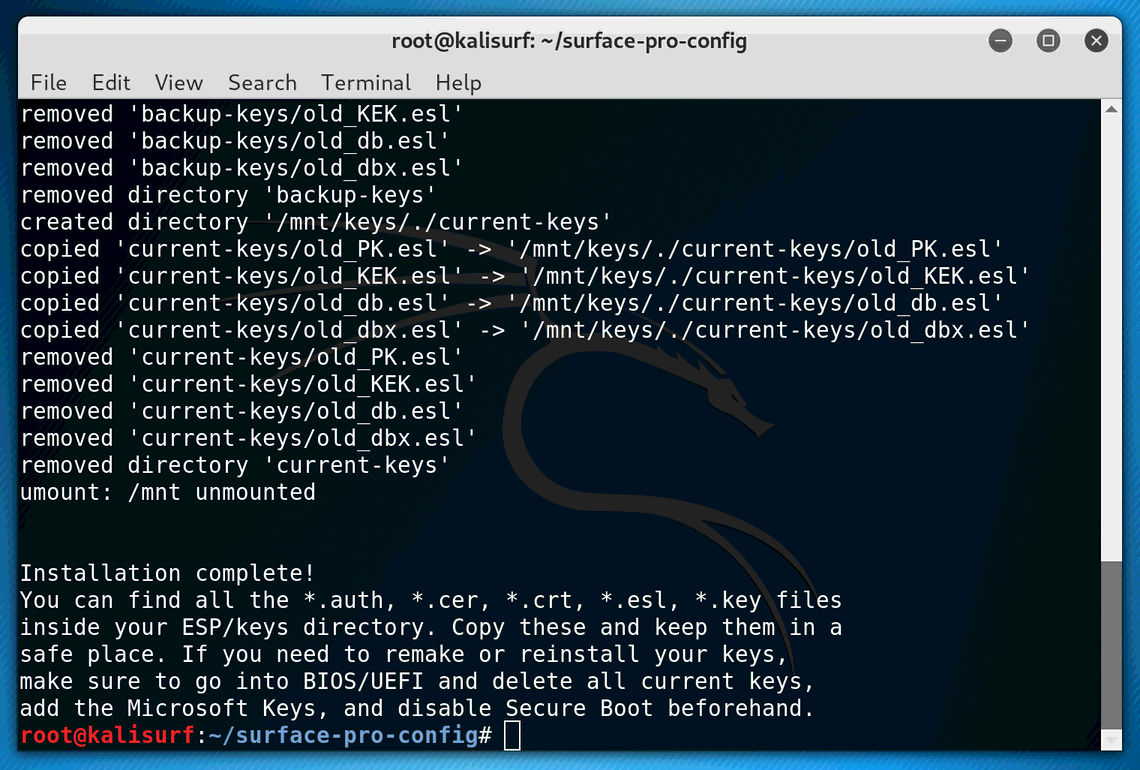
Installation complete!
You can find all the *.auth, *.cer, *.crt, *.esl, *.key files
inside your ESP/keys directory. Copy these and keep them in a
safe place. If you need to remake or reinstall your keys,
make sure to go into BIOS/UEFI and delete all current keys,
add the Microsoft Keys, and disable Secure Boot beforehand.</code>
If you’re interested in how the scripts work, what they do, or where they were derived from, check out the following resources:
- Managing EFI Boot Loaders for Linux: Controlling Secure Boot
- Sakaki’s EFI Install Guide/Configuring Secure Boot
- Arch Wiki: Secure Boot
These resources can explain whats going on far better than I ever could.
Confirm Everything Works #
If rEFInd doesn’t boot, then there was a problem during the signing process. Go back into your BIOS/UEFI settings and delete your keys, and put Secure Boot back into setup mode. Try the process again.
Once you reboot, Secure Boot will already be enabled and you should have the ability to boot into all of your operating systems!
If you go into the BIOS/UEFI, you’ll see “Secure Boot Enabled”. Sadly though, you will still be greeted with a red screen when starting your Surface. One of the sad points of using user generated keys.
Future Proof Your System #
We need to ensure that when the kernel updates, it gets signed by the keys you generated.
Otherwise, you wont be able to boot back into your system T_T how sad.
If all the key files are still in the EFI System Partition from the secure-boot-install.sh script, then everything is ready to go.
The necessary hook files are provided in the repo, if you haven’t grabbed it already.
Kali Linux #
You will need to replace the previously installed zz-move-kernel script with one that will sign the kernel when upgrading.
rm /etc/kernel/postinst.d/zz-move-kernel
cp kali/etc/kernel/postinst.d/zz-sign-kernel /etc/kernel/postinst.d/zz-sign-kernel
chmod 755 /etc/kernel/postinst.d/zz-sign-kernel
Confirm its working properly by reinstalling the kernel (your kernel might be a different version).
apt reinstall linux-image-4.19.0-kali4-amd64
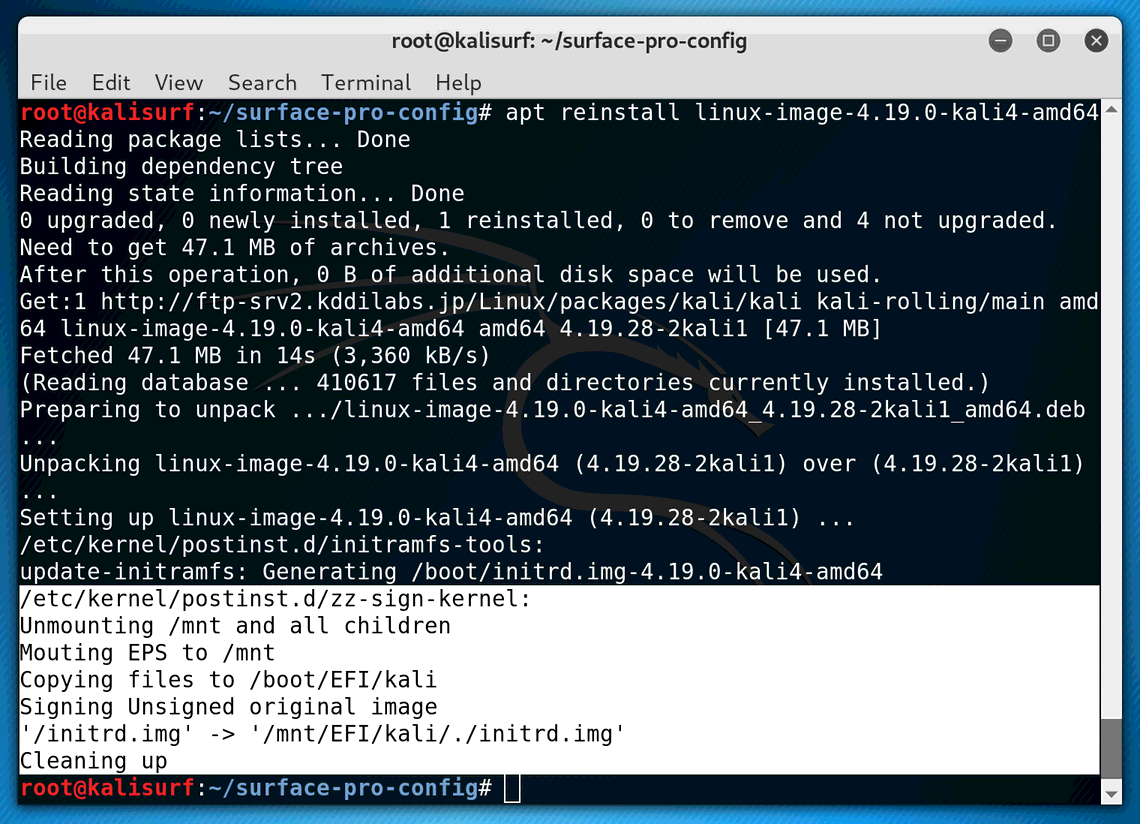
If there were no errors, thats a good sign! Restart the machine and ensure that you can still boot Kali.
ArchLabs Linux #
A similar approach will be taken for Arch Linux. Add the other hook for pacman that’s in the repo. This will sign the kernel with the keys we made previously.
sudo rm /usr/share/libalpm/hooks/99-linux-move.hook
sudo cp config/99-linux-sign.hook /usr/share/libalpm/hooks/99-linux-sign.hook
Confirm its working properly by reinstalling the linux package
sudo pacman -Sy linux
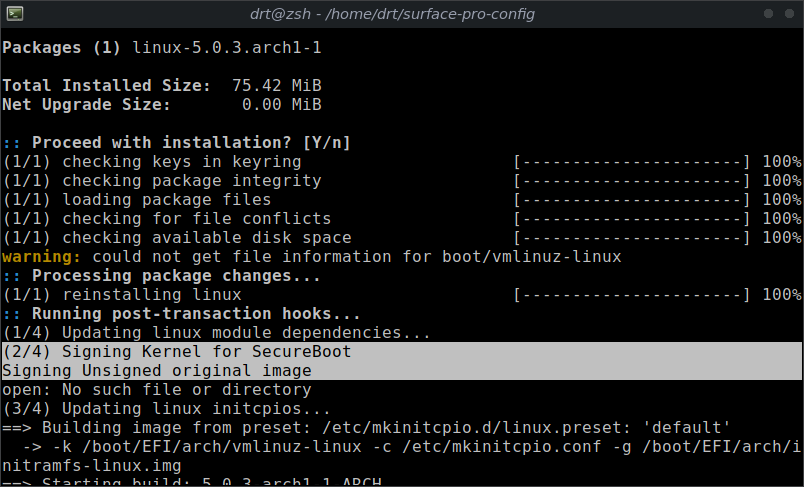
Again, no errors is a good start. Reboot the machine and confirm that rEFInd can still boot into ArchLabs.
Conclusion #
and. . . DONE! Your Surface should now be a lean, mean, mutlti-os, secure booting machine!! Any comments or questions leave them below!